Villain Invasion is the current event route built around four acts that add mechanics instead of only increasing enemy health. The developer’s official Villain Invasion video confirms the event theme. Current Pro Game Guides coverage documents the act structure and practical counters: control speed in Act 1, bring sustained damage for Act 2, use damage over time in Act 3, then coordinate all those roles for Act 4. Open the live Events panel before every farm session because the timer, reward eligibility and event shop can change independently of the stages.
Use the official video to recognize the event theme and units; use the live Events panel for rules, timer and rewards.
Enter the event and confirm eligibility
Open Events from the left side of the game screen, choose Villain Invasion, then move to the Event Game Mode area and select an act. That route is Community reported by a current screenshot guide. If the card is missing, do not follow an old private-server link; check the official Roblox experience and developer announcements to see whether the event rotated or ended.
Before launching, read the act description and reward panel. Confirm whether your account must own or equip a specific event item. A current guide reports that a Crow Relic is required to earn Villain Coins and other completion rewards in the final act, while players without it can still practice or help. Treat that as Needs in-game testing until the current act panel shows the same condition.
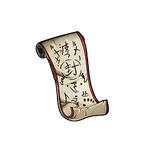
Crow Relic check
Inspect the current act and inventory wording before a reward run. Owning, equipping and merely seeing an item are different conditions.
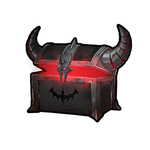
Villain Chests
Community guides describe chests from villain encounters and event milestones. Verify eligible modes and the current reward preview.

Villain Coins
Open the complete live shop before spending. Banner, material and equipment choices may share the same limited currency.
Four-act mechanic finder
Do not carry one blind preset through all four acts. The event is documented as a lesson in changing team roles.
Act 1 · stop the speed cascade
Act 2 · break layered defense
Act 3 · apply DoT before the kill
Act 4 · coordinate every role
These labels come from a current community walkthrough, not an official changelog. Read the modifier text in game. If the live description differs, follow the live description and adjust the role rather than the unit name.
Act 1: stop the speed cascade
The first act is documented with Armored, Commander and Death enemies. The important interaction is order. Remove the enemy that improves the pack before spending every upgrade on the nearest target. Place slowing coverage where it touches a long section of path, then overlap the main damage zone so slowed enemies remain under fire.
Community guidance warns that Armored enemies punish some area-of-effect patterns. That does not mean every AOE unit is unusable; it means you should test the attack shape shown on the unit panel and carry a direct or line-based answer. Keep a farm unit only if the opening lets it repay the investment before speed pressure grows.
If the run fails, check whether a Commander or Death enemy remained alive inside the group. Moving the main damage zone earlier can be more effective than adding another expensive unit at the end of the path.
Act 2: concentrate damage through defenses
Act 2 is reported to add Reinforced enemies, shields and regeneration. This is a sustained-output test. Upgrade one primary damage source to a meaningful breakpoint instead of placing several low-level carries. Pair it with a buff, debuff or secondary damage type that the live modifier allows.
Watch health bars after the first pass. If enemies regenerate between separated zones, pull damage into one longer overlap. If shields consume the first attacks, use reliable attack speed and broad coverage so the boss specialist is not wasting its entire cycle on disposable protection. Do not assume a flashy burst showcase will maintain pressure for a full act.
Act 3: apply damage over time before the kill
The current walkthrough identifies damage over time as the key counter to the Sword mechanic. Place the DoT source early enough that its effect lands before the rest of the team deletes the target. If teammates use very high burst, ask them to delay or reposition until the status is visible.
This act rewards controlled sequencing. Test the DoT unit on the first relevant enemy, confirm the effect icon, then upgrade the surrounding damage. If enemies still return, inspect whether the effect expired, missed the target or was blocked by a modifier. Do not spend rare rerolls to solve a placement problem.
Act 4: divide the squad into roles
Act 4 combines the previous lessons and introduces enemies documented as Splitter, Summoner and Dawn. Splitters increase target count after defeat; Summoners add enemies while alive; Dawn changes how their spawned enemies must be removed. The result is simultaneous wave pressure and mechanic checks.
A practical squad assigns one player to slow and utility, one to damage over time, one to broad wave clear and one to the main damage or economy plan. Players can cover more than one job, but name the responsibility before launch. Keep important placements separated enough that a single disruption does not disable the whole strategy.
Current community advice favors three or four coordinated players. That is not a formal minimum. Solo or smaller groups can still practice the route, but reward attempts should use the team size that clears consistently.
Farm Villain Chests and Coins carefully
Current community reports describe villain bosses appearing in non-competitive modes and awarding Villain Chests, with additional event milestones. Other reports describe opening chests from the Events panel or item bag and using Villain Coins in the event shop. Because the event is changing quickly, this page does not publish a fixed spawn chance, chest quantity or reward table.
To test the current loop, open the Villain event page, read the milestone counter, run one eligible mode, defeat one marked villain and compare the counter and inventory before and after. If nothing changes, check eligibility, event timer and server version before repeating the run. Record the actual result rather than relying on an old daily chart.
Spend Coins only after viewing the whole shop and current banner. Prioritize the evolution material or equipment that completes an owned unit over a speculative item for a unit you may never pull. Event currency becomes less flexible as the timer approaches its end.
Common failures and quick answers
- Entering Act 4 without reading Acts 1–3 removes the mechanic practice the event is designed to teach.
- Putting a DoT unit behind the burst zone can prevent the Sword counter from applying.
- Farming with an unverified relic requirement can produce a clear but no expected currency.
- Treating every Villain Chest quantity as fixed ignores event and server changes.
- Spending Coins before inspecting evolution needs can strand a limited unit in its base form.
Where do I enter Villain Invasion?
Current guides show Events → Villain Invasion → Event Game Mode. If it is absent, verify event status through the official Roblox experience and developer channels.
How many acts are documented?
Four. Their current labels and modifiers should be confirmed in the live selector.
Is a Crow Relic mandatory?
One current guide says it is required for some Act 4 completion rewards, not necessarily to enter. This remains Needs in-game testing.
What should I farm first?
First prove a consistent act clear, then match the live reward to one owned unit or upgrade goal. Do not start from an unverified drop percentage.